How to Use Github?
Welcome to the CEA development team! This guide will explain the main workflow of CEA, including basic functions and formatting preferences of the Zenhub plugin and Github Desktop.
Note
The following assumes that you have already have a Github account. If not, please create an account at Github.
Zenhub Plugin
The CEA team uses the Zenhub Plugin to facilitate communication between developers. The plugin creates a Zenhub tab in the CEA github repository and applies a scrum-style framework to application development. Groups of tasks can be lumped together into themed initiatives (called epics) which comprise of discrete tasks (called issues). For example, Bugs and Errors may be an epic containing a number of discrete issues such as Function X fails with KeyError Y.
Each Issue/User Story can be assigned a status in the pipeline of Zenhub, label (e.g. documentation), assignee, milestone, estimate, epic and release - feel free to use any which are appropriate.
- Pipelines are assigned using the following protocol:
Icebox: new issues which are identified but not currently in progress.
New initiatives and Active initiatives: these are reserved for epics and should not be used for an individual issue.
Breakdown: when new issues are in progress, they should be moved to this pipeline.
In development: this is reserved for issues which may stem from the breakdown phase and a worked on individually.
In review: issues are automatically assigned to this pipeline when a pull request is submitted.
Close issues: these are old issues which have been successfully merged.
Zenhub will then create the issue and assign an identification number.
Github Desktop Workflow
Github desktop is a handy user interface for tracking and merging local alterations to the remote repository.
For more information and visual walk-through, please check out the Github desktop guides.
When addressing an issue raised in Zenhub, it is important to note the following processes:
Git pull and branching
For more detailed information see the creating a branch guide
Open Github Desktop
- Click pull origin if working on a clean branch (no uncommitted local changes).
git fetch: fetches any commits from the target branch and stores them in your local repository.
git merge: integrates fetched commits into your working branch and files.
git pull: performs a git fetch and git merge. Pulling integrates any fetched commits into your current working branch, which can create merge conflicts.
- If altering an existing branch:
Select current branch and search for the issue number assigned by Zenhub.
- If creating a new branch:
Press Ctrl+Shift+N (or current branch > new branch from the drop down list).
- Name the new branch based on the following format
issue#-issue-name-lower-case-hyphenated e.g.
107-documentation-needs-updating
- Name the new branch based on the following format
Click Repository from the drop down menu.
Select
Open in command promptORShow in explorerOR use your preferred text editor (e.g. Pycharm) depending on preference.Open and perform necessary modifications or additions to scripts or files.
Ensure all changes are tested for functionality.
Save alterations once completed.
Git commit
For more information see the committing and reviewing changes guide.
Return to Github desktop.
Review all changes in the Changes tab on the left hand side.
In the bottom left corner, write a brief summary of your changes followed by a description of what has been changed and why.
- Click
Commit to...button, ensuring you are committing to the correct branch. git commit: committing tracks and saves any changes or new files created locally.
- Click
Repeat processes until you are ready to merge with the master repository.
Git push
For more information see the pushing your changes guide.
When ready to update team members with your changes, ensure latest changes are committed.
- Select
Push origin. git push: pushes your local commits to the remote repository. Note: branches and commits will be available to others only once pushed to the origin.
- Select
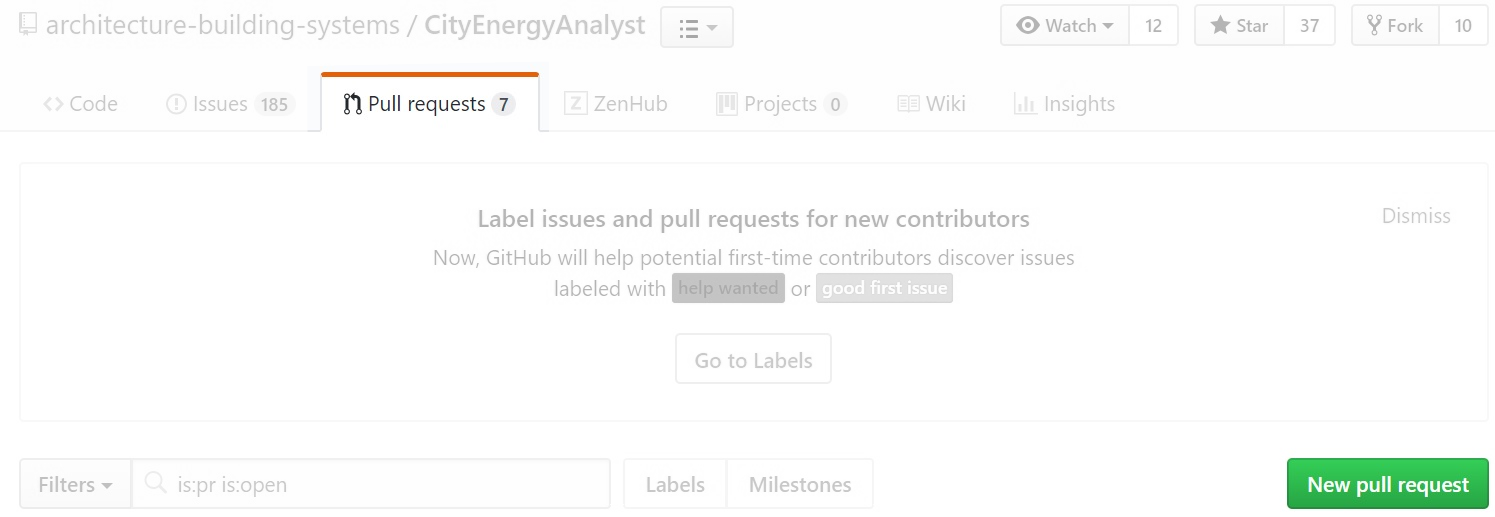
How to create a pull request
If you’re happy with your contribution to CEA, it’s ready to merge with the master branch, also known as a pull request!
1. Open the remote repository in your browser OR in Github Desktop under branch.
If you’re using your browser click the
pull requeststab.Select
New Pull Request.
Select the branch you have been working on and review your changes.
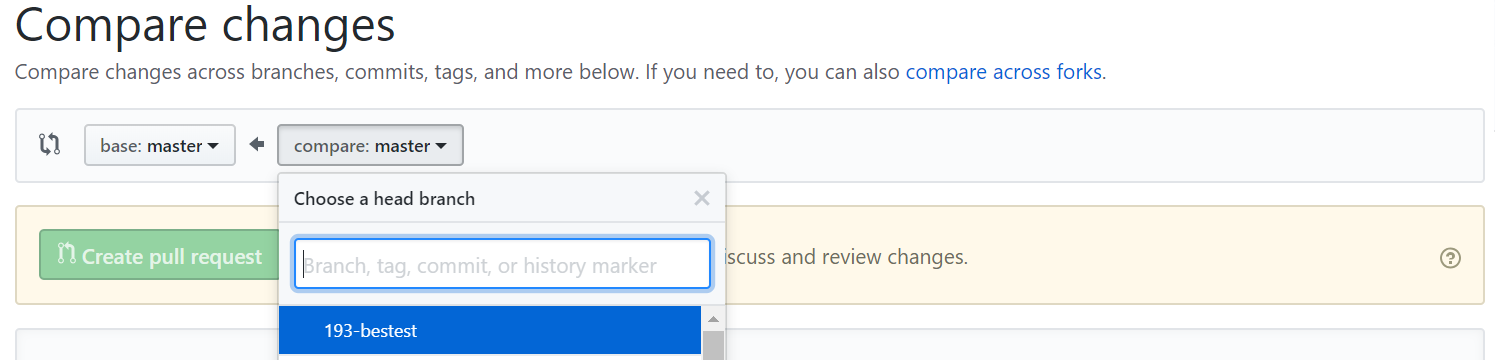
Click
Create pull request.Ensure the request is linked to the Zenhub issue and add a reviewer and any other comments.
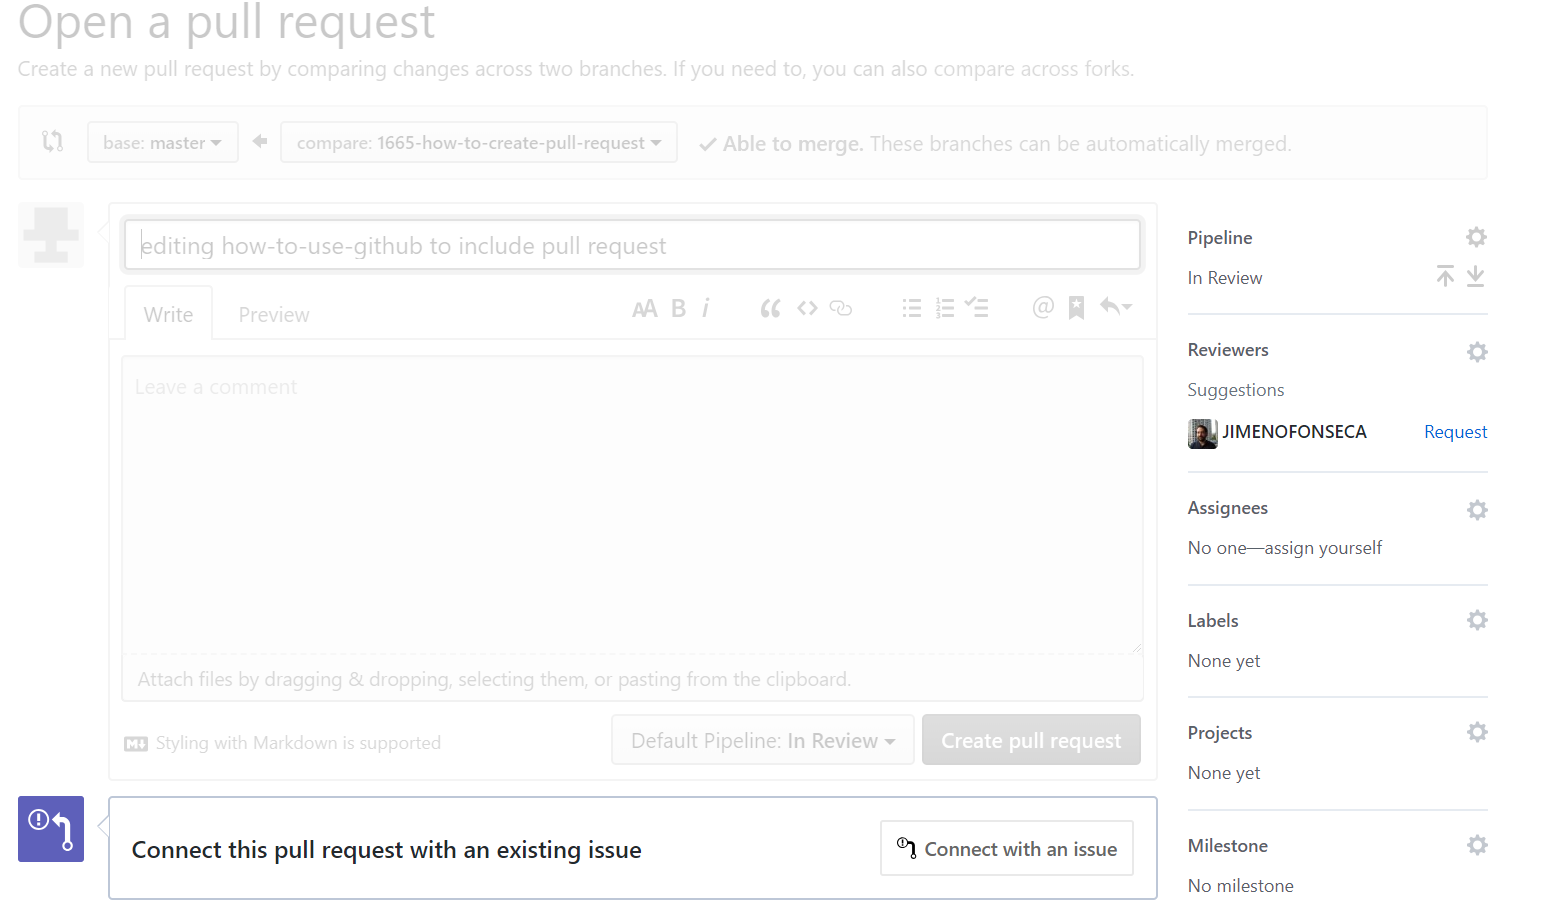
Click
Create pull request.Admins will check your code and if deemed functional, they will merge with the master.